How to Migrate Other Types of IMAP Mailboxes to Microsoft 365 or Office 365
By: SmallBizClub
If you don’t have your Exchange Server up to standard or you have an unsupported Exchange Server, you cannot use the normal migration processes, like full or minimal hybrid, cutover, phased, etc., when migrating from Exchange Server to Office 365 or Microsoft 365. This means that the only solution would be to migrate using IMAP.
With Office 365 or Microsoft 365, you can migrate your data from any IMAP source to Exchange Online. Let’s get started.
First, you need to make sure that the domain you will be using is configured in Office 365. This doesn’t mean that your domain will migrate as this is the last part. The first part is to add the domain as an accepted domain. This can be done in the Office 365 portal by following these steps.
- Once logged in, open the Admin Center.
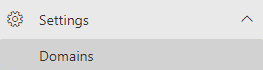
- Click on Settings and click on Domains.
- Click on Add Domain.
![]()
- Enter the domain name and click Use this domain.
![]()
The next step is to verify the domain by:
- Adding a TXT record to verify
- Adding a Text File to verify
Once this is done and you’ve added the required records, you can verify the domain ownership.
![]() At this stage, you can stop as the domain is now verified and usable in Office 365 to create users, set up email addresses, and in preparation for the migration. To add users, you can use the manual method if you have a few users. But if you have a good number of users, it will take a long time. So, you can create users using a CSV file.
At this stage, you can stop as the domain is now verified and usable in Office 365 to create users, set up email addresses, and in preparation for the migration. To add users, you can use the manual method if you have a few users. But if you have a good number of users, it will take a long time. So, you can create users using a CSV file.
![]() Once you choose to add a user, you can use the internet domain along with assigning the right email address and domain. Here, you can also assign the Office 365 or Microsoft 365 license so that the user’s mailbox and OneDrive are created and ready for use.
Once you choose to add a user, you can use the internet domain along with assigning the right email address and domain. Here, you can also assign the Office 365 or Microsoft 365 license so that the user’s mailbox and OneDrive are created and ready for use.
Now, follow these steps:
- Open the Exchange Admin Center in your Office 365 portal.
- Click on Migration and Migration
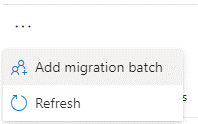
- Click on Add migration batch.
- Enter the name of the migration batch and click
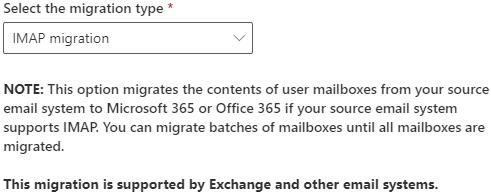
- Here, you will need to change the migration type to IMAP migration and click Next
 Click on Create a new migration endpoint and click
- Enter a name for the endpoint, which is the source server.
 Before clicking Next, you can also consider the maximum concurrent migrations and incremental syncs to be allowed in the migration.
Note: Do not add a lot of concurrent connections as it will disrupt and saturate your server’s internet connection.
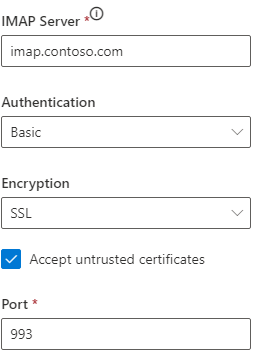
- Enter the URL of the server, the authentication – be it NTLM or Basic, and the Encryption to be used – TLS, SSL, or none.
- If your Exchange Server is using self-signed certificates, tick the Accept untrusted certificates.
- Finally, enter the port number.
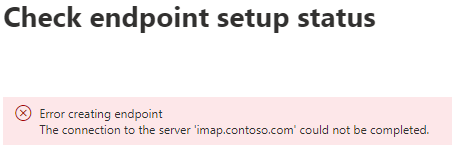
 It’s important to confirm with your Exchange Server administrator about the name, authentication, and encryption as well as the port to be used. You will also need to check with your network engineers that the mentioned ports are allowed on the external routers and routed to the Exchange Server accordingly. If your IMAP service cannot be reached, you will get the below error and will not be allowed to proceed.
 If all is good, you will get the message that the endpoint has been created.
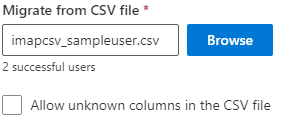
![]() The next part is to create a CSV file of the mailboxes to be imported. The best thing is to click on Download a CSV file with headers only to have the right structure to work with.
The next part is to create a CSV file of the mailboxes to be imported. The best thing is to click on Download a CSV file with headers only to have the right structure to work with.
Here, you need to either reset or know the password of the mailboxes that are to be imported. Enter the email address of the destination, username, and password.
 Once ready, click on Browse to select the file and click Next.
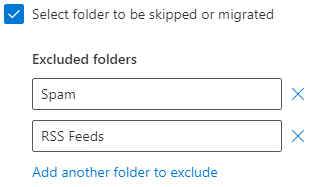
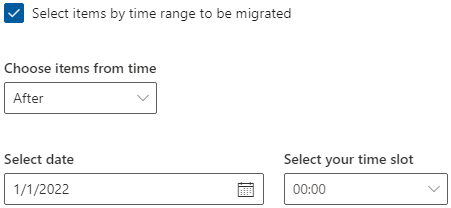
 On the next screen, you can do some filtering by selecting folders, like Spam and others to be excluded, along with the time range to import, if you want to.
 Select the email address to receive the notification and report of the migration and choose when to run the migration batch.
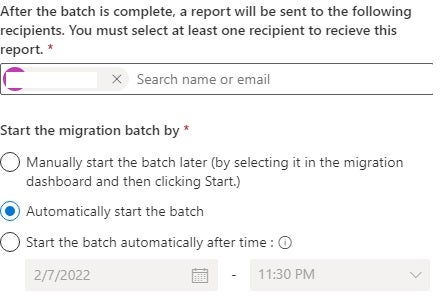 After this is complete, click Next. Once it is created, the migration batch will be shown as Syncing which is the first step.
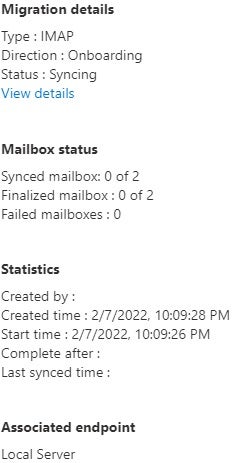
 If you click on the migration batch, you will get the complete status of the migration and any issues that may arise.
 If all goes well and there are no connectivity issues or any other issues with your local Exchange, the migration will start and will be completed. However, if something goes wrong or your Exchange Server cannot be accessed from outside, you might face issues with the import process.
In this case, it would be best to have the right tool by your side for a smooth migration. One such tool is Stellar Converter for EDB. It can open a single or multiple EDB files from any Exchange Server and export to PST and other formats. It can be used as a migration tool as it exports directly to a live Exchange Server database or Office 365 tenant. You can also check this blog for troubleshooting IMAP Migrations to Office 365.
3428 Views
Trending Articles